Page Contents
OVERVIEW
This page discusses an important nuance of CT studies that is commonly overlooked: proper windowing during the analysis of images. How a study is windowed has a significant impact on the ability to interpret the patient’s anatomy as well as any pathology. It is for this reason that CT studies should be properly windowed prior to image interpretation.
This topic can get confusing, however it is important to remember that these windowing settings are simply image processing features for a CT scan that help highlight key anatomy/findings so that image interpretation can be made as easy as possible. An example is using the “bone window” to visualize the scanned bones clearly in order to identify a fracture.
IMPORTANT BACKGROUND: HOUNDSFIELD UNITS
It is important to remind ourselves about the Hounsfield unites (HU) when thinking about windowing. The higher the HU value the more dense an object is. Here are some important values to keep in mind on the HU scale.
- Air: -1000
- Fat: -100
- Water: 0
- Soft tissue: 50
- Bone: 400
- Metal: 1000
Adjusting windowing settings deals exclusively with these Hounsfield units and relates certain values to different shades of white, grey, and black. This is explained more in the sections below.
WINDOW SETTINGS: WINDOW WIDTH VS. WINDOW LEVEL
When viewing CT images often times there will be “standard” window settings that can be used quickly in the image viewer. These settings are quick to use and often times the most practical way to quickly change between window settings. They also can help teach the concepts important to understanding what exactly window settings are. Below is an example of some standard window settings that can be found in a particular program utilized for reading CT scans.
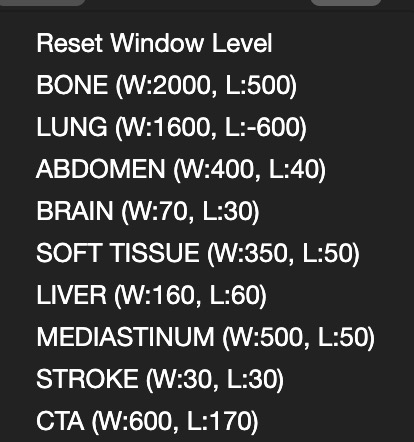
The numbers seen in the figure above represent two different values. The first value listed is the window width (w/w) while the second represents the window level (w/l). Let us quickly define what each of thee values represent.
Window width: the window width refers to the number of different HU units that will be represented by different shades of gray. Any HU value that falls below the lower value of the window width will show up as BLACK on the scan while any HU value that is above the upper value of the window width will be WHITE.
Window level: the window level refers to the midpoint HU value that is represented on the window setting. The lower the window level is set, the brighter the entire image will become.
SIGNIFICANCE OF CHANGING WINDOWING SETTINGS
Learning about things like window width and window level can seem tedious, however adjusting these settings can have a significant impact on image interpretation. This is because the human eye can only see a finite number of colors that range from black to grey to white on the CT scan. These settings adjust how these colors are utilized and adjust the contrast and brightness of the image. Here is a a key summary of how changing each setting will alter the image:
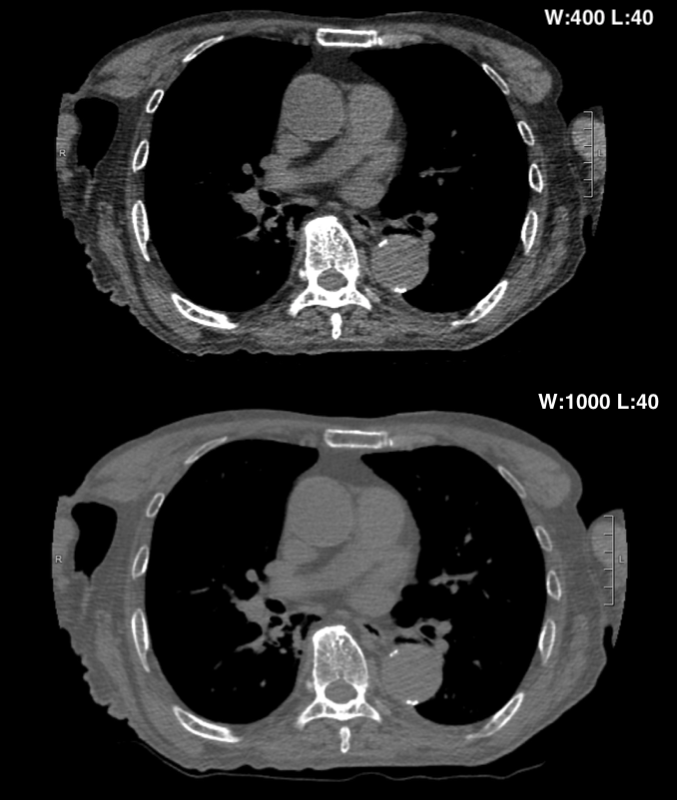
Adjusting The Window Width:
Increasing the window width will DECREASE the contrast of the image: as the width of the window increases a larger change in density will be required to change the shade of grey that represents a a certain HU unit. This results in a loss of contrast as more structures will appear similar (despite having different densities).
Decreasing the window width will INCREASE the contrast of the image: as the width of the window decreases, a smaller change in density will result in a change in color on the study images. This will give increased contrast as structures that are close in density will have different shades of grey/white/black assigned to them.
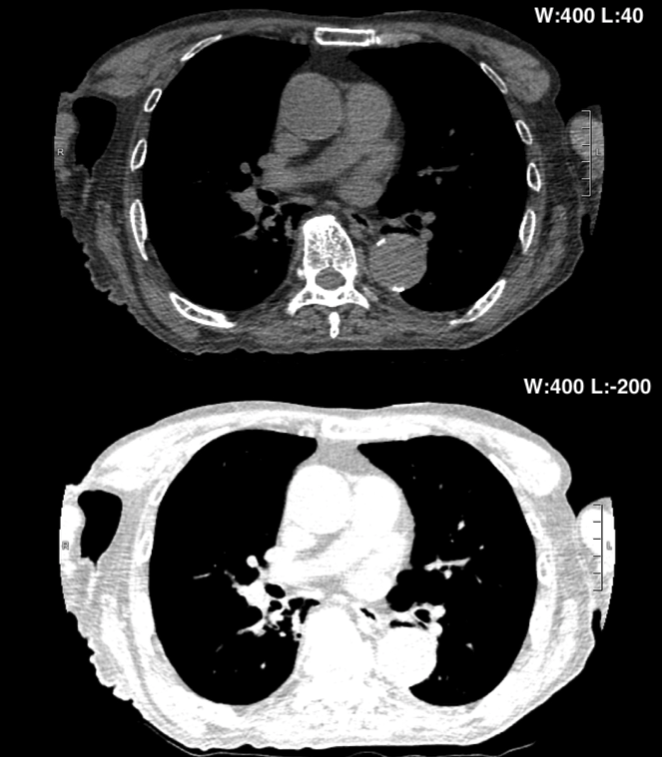
Adjusting The Window Level:
Increasing the window level will DECREASE the brightness of the image: as the window level is increased, the image will get darker. This is because as the level is increased, higher HU values will be required to in order for a density to be represented as white.
Decreasing the window level will INCREASE the brightness of the image: as the window level is increased, the image will get darker. This is because as the level is decreased, lower HU values will be required to in order for a density to be represented as white.
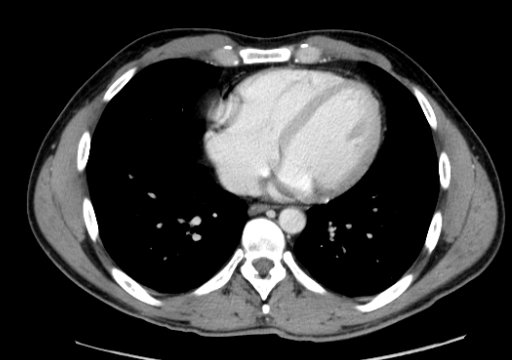
SOFT TISSUE WINDOW
Window settings: (W:350, L:50)
Advantages: as the name suggests, this window is used to evaluate soft tissues. The window level is set at the density of soft tissues (50 HU) and a moderate sized window is used to give a balance between contrast and resolution.
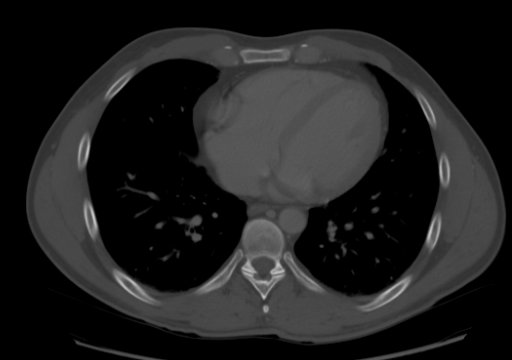
BONE WINDOW
Window settings: (W:2000, L:500) or (W:3000, L:1000)
Advantages: as the name suggests, this window is useful for viewing the bones. A high window level near the density of bone (given its density the level is HIGH) is used with a wide window to give good resolution.
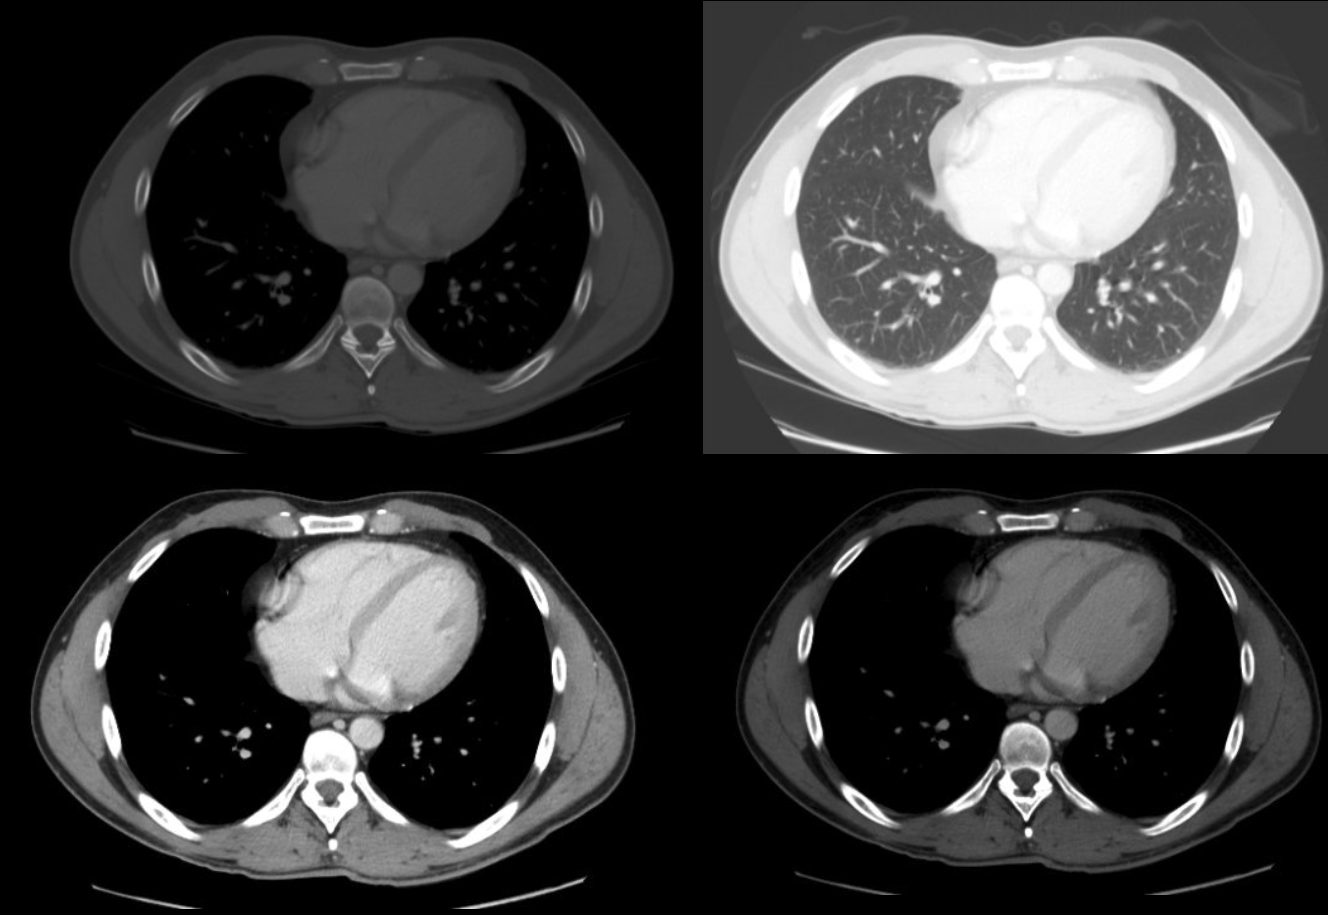
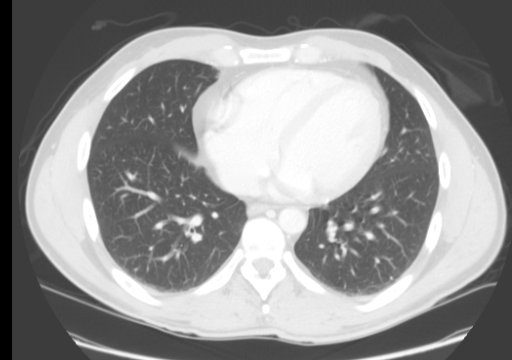
LUNG WINDOW
Window settings: (W:1600, L:-600) or (W:1500, L:-500)
Advantages: as the name suggests this window is used to evaluate the lungs. A high window level near the density of lung tissue (given its low density the level is LOW) and is used with a wide window to give good resolution and to visualzie a wide variety of densities in the chest such as the lung parenchyma as well as adjacent blood vessels.
ABDOMINAL WINDOW
Window settings: (W:400, L:40)
Advantages: as the name suggests this window is used to evaluate the abdominal cavity and its contents. A window level close to fluid/soft tissue is used with a medium sized window that gives a moderate amount of contrast.

LIVER WINDOW
Window settings: (W:160, L:60)
Advantages: This window is similar to the abdominal window however utilizes a narrower window to increase the the contrast in the liver parenchyma (in order to make finding hepatic lesions a bit easier).

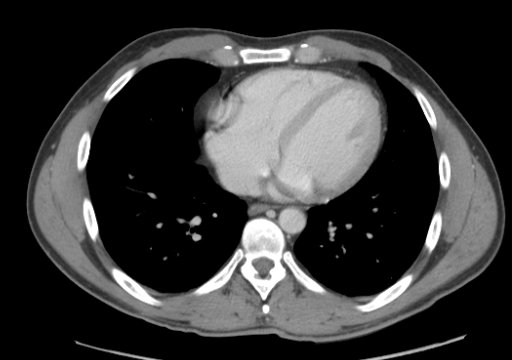
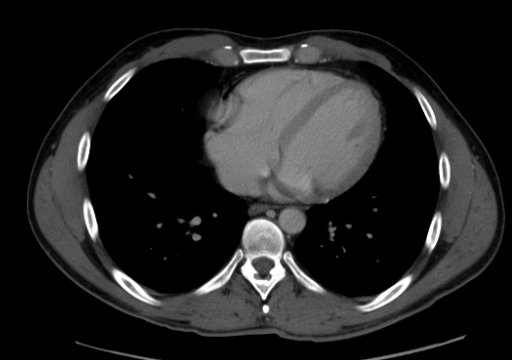
MEDIASTINAL WINDOW
Window settings: (W:500, L:50)
Advantages: these settings are similar in nature to the soft tissue settings or the abdominal settings and are adjusted slightly to try and reveal mediastinal pathology as clearly as possible.
CTA WINDOW
Window settings: (W:600, L:170) or (W:650, L:225)
Advantages: when evaluating a CT angiography study (or any phase of a CT scan with considerable contrast in the vessels, this setting can be used to try and see the vascular pathology clearly. It serves a good balance with providing signal in the target vessel without too much brightness in the vessels that wash out intra-luminal pathology.
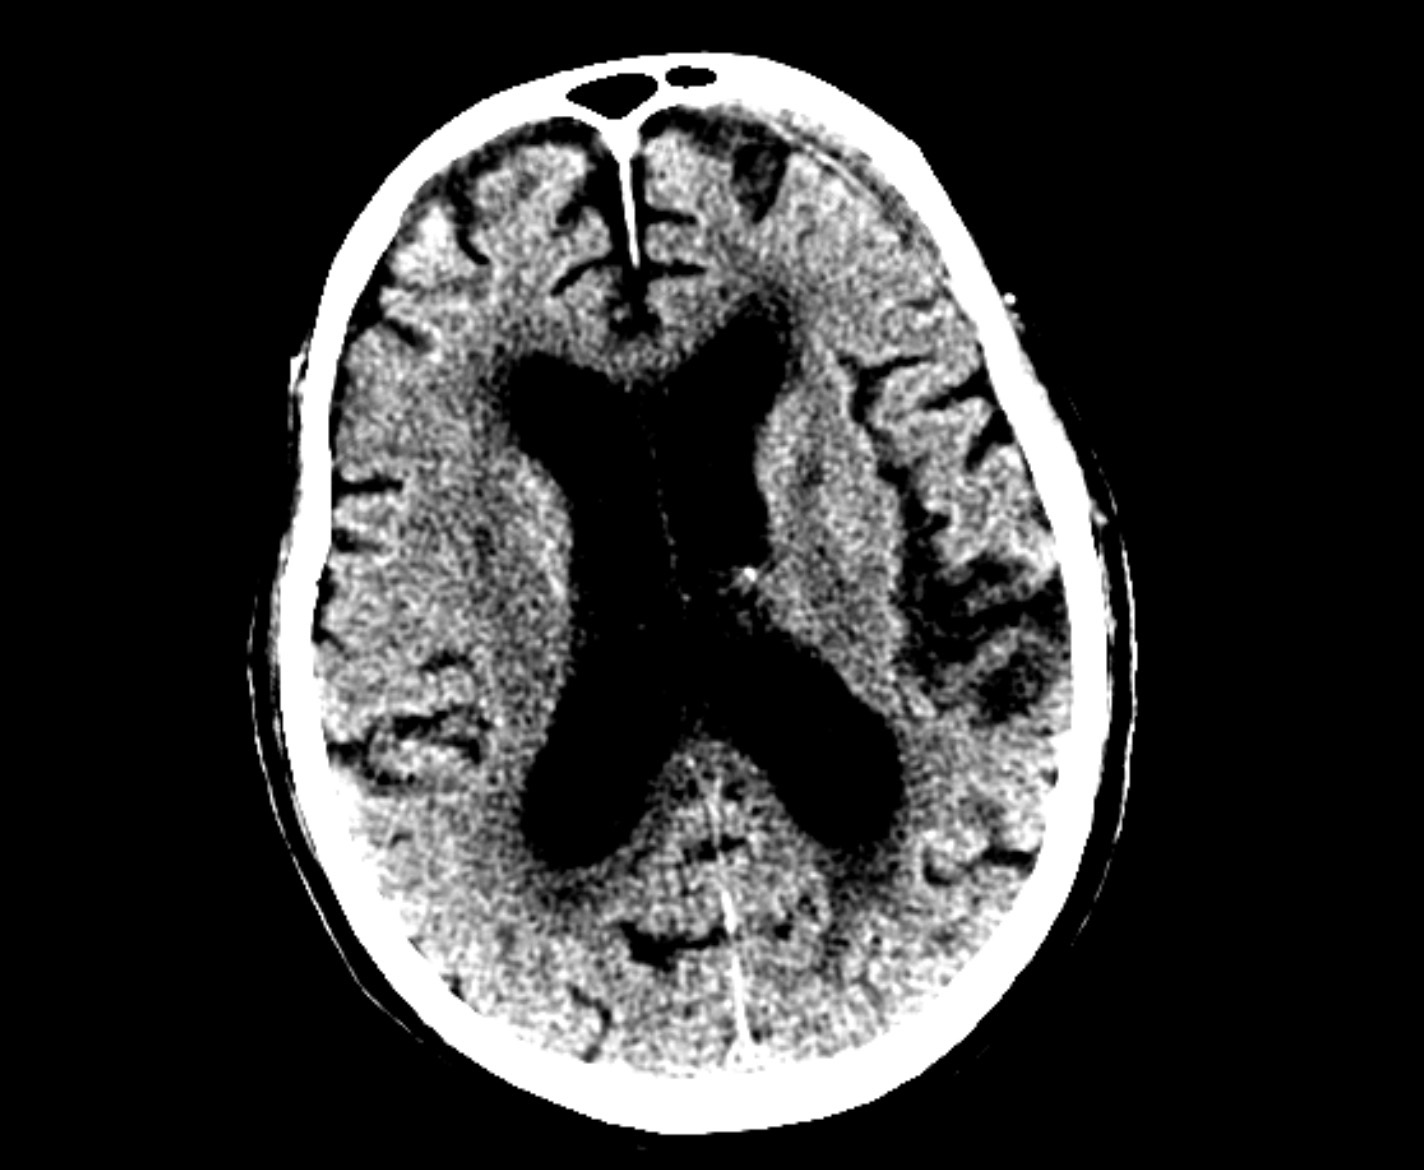
BRAIN WINDOW
Window settings: (W:70, L:30) or (W:70, L:35)
Advantages: this window is designed to evaluate the brain parenchyma (typically on a non-contrast scan) and is especially sensitive at picking up intracranial hemorrhage with a narrow window and a level close to the density of expected hemorrhage in the brain.

STROKE WINDOW
Window settings: (W:30, L:30)
Advantages: this window is also used to evaluate the Brian parenchyma, but is better at evaluating for hypo densities that may be seen in the setting of a stroke (although other etiologies are also possible). It has a similar level to the above brain window but has a much more narrow window which increases contrast and helps hypodensities appear more prominent.
Page Updated: 12.28.19